Pages

Past Challenges #1 - #178

Monday, April 30, 2012

Save the Earth Cricut Crawl

Happy Monday and welcome to FCCB's Save the Earth Cricut Crawl!


#109 - Save the Earth Cricut Crawl
Make a project using a recycled item.

When linking your project, please remember to list on your blog what Cricut cartridge you used.

Here's how the Crawl will work:
1. The crawl will begin here at FCCB. Participants will visit each Design Team member's blog to view their FANTABULOUS projects. Participants may follow the provided links at each blog or click on the links provided with the sneak peeks below. If you get lost along the way, you can always return here to FCCB to follow the links to our Design Team members’ blogs.

2. There will be prizes along the way at some of the Design Team blogs, so be sure to check out the goodies up for grabs! *You must meet the Design Team members' stated criteria to be eligible for the individual prizes. Please see each DT member's blog for details and directions.

3. There will also be one GRAND PRIZE here at FCCB!! The prize will be awarded to a participant that meets the challenge criteria and posts a link to their project below, drawn randomly by Random.org. 

Design Team Inspiration
 Here are the Design Team project sneak peeks, in the order of the Crawl. Be sure to follow each link to see full pictures of the projects, and to participate in any individual blog candy giveaways!


This Weeks Sponsor
Paper Issues
Cassie is sponsoring us with a Gift Certificate to the Paper Issues Etsy Store.


Paper Issues Blog Design


To link your project for this week's "FCCB Save the Earth Cricut Crawl" challenge,
click on the blue "add your link" button below!
This challenge ends at Midnight, May 6th (Mountain Time).


As a courtesy to our design team, please consider turning off the word verification on your blog. With the new system, it has become quite difficult to leave comments for our FANTABULOUS followers.

When linking your project, please remember to list on your blog what Cricut cartridge you used.


post signature

Saturday, April 28, 2012

Scrappin' Saturday - On the Go


Happy Scrappin’ Saturday Everyone!!  Are you ready for a Summer Road Trip?  Or Summer Vacation where you have to take a plane to get to your destination?  
 
#108 – On the Go Make a project with a car, bike, train, plane, ect.
This week's challenge makes me think of taking a Summer Vacation...traveling by car, train, plane....doesn't it you?  If you haven't submitted a project this week...there is still time!!  Today I wanted to share a couple projects that have a car, bike, train, plane on them.
 
Heather
over at Scrapping Runner Creations made this adorable birthday card using a plane!  Such a great card to give to a boy!!  I love how she popped up the clouds to give it some dimension!
 
Monica
over at Crafty Moni made this incredible layout using a truck on it!  How cute is this?!?  I love looking at layouts that others have creatived as they get me motivated to complete some of my projects I have 'pending'.  :) 
 
What kind of projects have you used car, bike, train or plance on it?  We love comments...so leave one with your blog address so we can stop by to see your great creations!  Hope you have a great Fantabulous weekend & are able to find some time to do some Scrappin’ this Saturday!   Thanks for stopping by!

Melissa
post signature

Friday, April 27, 2012

Fantabulous Friday - On The Go

Hi, everyone! Faith Abigail here with this week's edition of Fantabulous Friday. Our theme this week is On The Go; make a project with car, bike, plane or train.

The Sweethearts features an adorable tandem bicycle for two...


...and the Campin Critters features a cute, loaded down SUV. 


The Cricut Craftroom Exclusive: City Transportation has a wonderful variety of urban themed transportation.


Now, on to some projects!

Cindy created this gorgeous, vintage-inspired card using the Heritage cartridge...


...Bonita created this beautiful birthday card using the delicate hot air balloons from the Summer in Paris cartridge...


...and Heather created this adorable card using the Pop Up Neighbor Cartridge. 


Thanks for stopping by! I hope you've found some inspiration!

Photobucket


post signature

Thursday, April 26, 2012

Thursday Tutorial with FCCB....Cascading Card

It's Holly here with another Thursday Tutorial.   Boy, do I have a tutorial for you today! 

Check out this Fantabulous Cascading Card made Dr Sonia from Cards, Crafts and Kid Projects


Cascading card
Since this blog is called Fatabulous Cricut, we do like to see things made by Cricut but when I saw this card I was like WOW!  

I let the Cricut part slide this time because I can make a cascading card for you using Cricut cuts but more importantly this Fantabulous designer is from India!

I'm guessing Cricut accessories aren't as readily available in India as they are here in Northern America and it's not like she can run down to her neighborhood Michael's and JoAnn's right?  

Let's give her a pass since her tutorial is so great.....


Materials Required to make a cascading card
Card stock : 2 pieces measuring 5.5 x 12 inches - use fairly thick sturdy card if you want to add lots of embellishments like I did.
Scoring tool- if you dont have one use a blunt knife or dry pen.
Scale
Pencil
Scissors
Make the Panels of your Cascading Card
Cascading card tutorial

Mark 3 inches down one side of the card stock as shown. Cut off the white triangle you get as shown in the cascading card template.Do this for the other piece of 5.5 x 12 inch card too to get the panels of your cascading card.
Mark the Panels
The Cascading card is just 2 accordion folded cards interlocked together by slots.To help you know where to make your slots you can mark both your panels as shown.
If you are using a scale mark the midpoint of 2 sides of your panel as shown. Measure 2 3/4 inch on the taller side and 1 1/4 inch on the shorter side.Join with a pencil line.


Cascading card tutorial
I used a score pal as shown below to help quickly find the midpoint. I marked the short side and turned it 180 degree clockwise to mark the longer side's midpoint.
Cascading card tutorial

Your Cascading card panels are mirror images and shown below is how the panels will look marked.
Cascading card template
Score your panels at 4 inch intervals[ black lines]. If using a score pal score at 4 and 8 inch mark.
Make the slots:If you use a score pal it is super easy to make your slots.Drop down score lines to meet the pencil line marked earlier. The slots will be at 2 , 6 and 10 inch marks as shown.

Cascading card tutorial
Cut out 1-2mm wide slots.Accordion fold your panels as shown. The folds are Valley- Mountain in the 1st panel and Mountain- Valley for the 2nd panel of your cascading card.
Cascading card template
Interlock the slots of your cascading card starting from the taller end.The slots fit so nicely together that no glue is required and your card will expand and collapse at will!


Dr. Sonia has many more detailed photos on her blog which you can check out HERE.

I gave Dr. Sonia's tutorial a try so here's what I came up with for my cascading card.

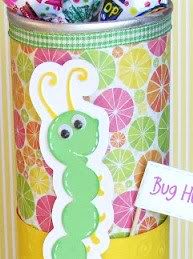
If you remember my Thursday's post from last week I mentioned everyone was "sicky-poo" in my house so I made a "Get Well Bug" cascading card for us. 
My "Get Well Bugs" are cut from the Paisley cartridge and the stamped sentiments are from My Pink Stamper.  You can check out more details about my card on my blog at Ribbons & Glue.

I hope this cascading card inspires you to give Dr. Sonia's tutorial a try!


post signature

Wednesday, April 25, 2012

Wednesday Winners #107

Good Morning Fantabulous Friends,

Oh my goodness, it's been another one of those absolutely unproductive weeks for me dealing with my Fibromyalgia.  I am so hoping that things start looking up soon because I'm really missing my crafting!!!  I'm so happy to be able to do these Wednesday posts for everyone though because it gives me a wonderful chance for inspiration even if I can't physically start a project right now.  I love to save projects that our crafty friends make in an inspiration folder on my desktop, with a link to their blog so when I use it for inspiration, I can give credit where credit is due.  My advice for today is if you're feeling a little lackluster yourself, check out these amazing projects and if you find something you really love, create your own "inspiration folder". :0)

Last week's challenge for FCCB was "April Showers". Quite fitting, don't you think?  I was on the DT scheduled to post for that challenge and unfortunately, I didn't get my project done on time; however, I do have it now and would love to share it with you!  I hope you enjoy it and thanks for peeking at it. ;)

3 Birds on Parade, April Showers, A Child's Year

Now, doesn't that make you want to go back and see what all of our amazing DT and our awesome challenge participants came up with?  If you click HERE you can do just that!  Thank you to all of our participants!

Let's get on to this weeks Top 5 picks from the DT, shall we?  Before we do however, I have one other thing I have to mention... For all of our challenges please be sure to include at least ONE Cricut Cut (can be an SVG as long as it's cut with your Cricut) on your project or it will not be eligible for the Top 5 or the Winner of our sponsored prize (when applicable).  This is very important as we are a Cricut Challenge blog! Thanks so much, Friends!

Drum-roll please....................................................


~Design Team Top 5~


# 5 PinkE - Creations by Pink E
Photobucket


#58 Julie - 9 2 Midnight


#11 Kathie - Let's Get Scrappy Together


#67 Jill Rugg - Just Jill


#28 KatieO - KatieO's


Congratulations Ladies!!!


Remember to grab your "FCCB Top 5" blinky to display on your blog! You can find the blinky code on our right-hand sidebar.


Thank you to all those who participated in our challenge.  We loved your projects!!!
Come join us for this week's "On the Go" challenge - Here.
Make a project with a car, bike, train, or plane.
(Be sure to use at least ONE Cricut cut on your project.)

XO ~ Amy Jo
post signature