It's Missy here with another Cricut Craft Room tutorial for you. Last week we learned how to manipulate our images when we place them on our mat. This week, we're going to talk about the "Hide Contour" feature.
If you're new to Craft Room, you may not even know what on earth "hide contour" means. This is a really handy feature when you're trying to make an image more of "your own" design. Hiding contours simply means telling your Cricut NOT to cut certain parts of an image.
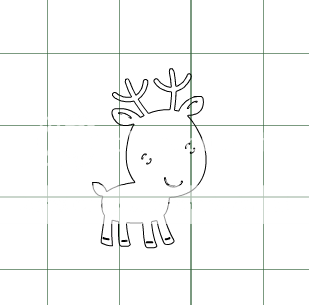
Why would you want to do this?? Lots of different reasons!!! Let's say you want to cut that super cute little reindeer from Create a Critter 2, but you have a face stamp you'd rather have on him instead of the face that you would create if you cut all the layers. Well, your main image layer is going to look like this.
See those black lines along where his eyes and mouth will be?? If you're going to use your own face stamp, you don't want those lines to cut out, because it wouldn't look right. Another example is this tree from Simply Charmed. Let's say you wanted to cut the tree out, but instead of cutting the leaves that comes with the image, you want to add some little hearts to it, for like Valentines Day or something.
You wouldn't want those cut lines for the leaves showing up, so you'd want to hide them. Another example might be if you were going to make a box or a bag from a cartridge, and you didn't want the score lines to cut, because you were going to score it a certain way yourself---you could hide those so they wouldn't show. Those are just a few examples. Now let's get to how you do it!!
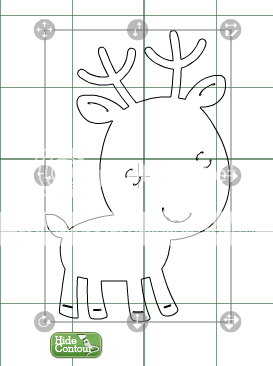
When you've chosen an image that you want to "hide" something on, place the image on your mat and select it. I'm going to work with that adorable little reindeer here.
See in the lower left hand corner, that green box that says "Hide Contour"? Click on that. Now, as you hover over your image, you will notice that some of the lines "light up" red. As you move your arrow around, hover over the lines you don't want to cut. When the line turns red, click it, and it should turn to grey.
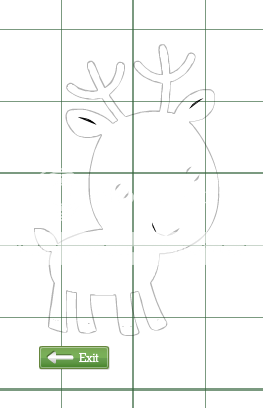
The greyed out lines are the ones that will not be cut. The ones that are in black will be cut. In the picture above, I've hidden the reindeer's eyes and mouth, so I could use that cute little face stamp on him if I wanted.
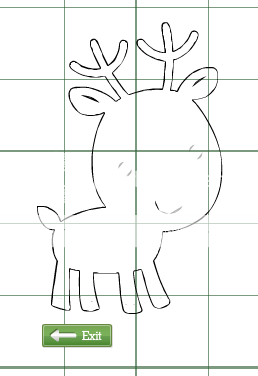
Oooopsies......what if I click on something to hide it, but I really want it to be cut, like I did here?? I accidentally selected the whole reindeer's body, but I really want his body shape to be cut.....
Easy peasy!! Just click on any greyed out line and it will again appear black and will be cut. And, to get out of the hide contour "window", click the little green exit button and it returns you to your regular mat function.
So there you have it. Some reasons why you might want to hide contour, as well as an easy way to do it. I'll be back next week with another fun tutorial for you!!!


Great tutorial - I do this in my Gypsy - I have not used the Cricut Craftroom - I think you have to hook up your Cricut to cut but I am not sure - thanks for the tutorial! Enjoy your day!
ReplyDeletehttp://ilikepaper01.blogspot.com/
OMG! Thank You! I had no idea what that meant! The possibilities is even more limitless.....
ReplyDeleteThank you...love all your tips!
ReplyDeletei had no idea what hide contour was! what a great feature! thanks for the easy to follow and understand instructions :)
ReplyDeleteI just found the contour feature however, I there are lines within the image that do not show up to be able to hide them but they are there when I cut. Have you encountered this? I am trying to use the gum ball machine on the sweathearts cartridge.
ReplyDelete