Welcome to Fantabulous Cricut Challenge Blog! Cricut enthusiasts come share your projects with us. Twice monthly we offer simple challenges for your chance to win! No matter which size Cricut machine you have, come join the fun.

Saturday, March 20, 2010

Scrappin' Saturday #1: Custom Shaped Mini-Albums

Welcome to the first Scrappin' Saturday here at FCCB!  Each week I'll be featuring a project, a techniuqe or topic about scrapbooking...all related to using your Cricut and/or Cuttlebug, of course!  If you would like to request a topic or have a suggestion for me, please email me at TheHouseholdCEO@live.com


For the first Scrappin' Saturday, I'd like to share some tips on making your very own shaped mini-album!  Mini-albums are a GREAT way to focus on a single event or subject, and can be whipped up in a fraction of the time it takes to complete an entire album!  And your Cricut can be your best friend when you want to really customize your mini-album...

 You can buy pre-made shaped chipboard albums, but you typically won't be able to find a wide assortment of shapes or a variety of die-cut papers to match.  Here's a better option:  make one of these shaped mini-albums using materials that you would normally just throw out in the garbage/recylce bin and save money (and the planet!) while doing so!

 
Go dig out those cereal boxes, cardboard liners from that package you got in the mail yesterday or even the backs of notepads.  These are all FREE and just waiting to be transformed into something beautiful!  For this flower mini-album, I used the front and back of two cereal boxes. 

 Depending on the weight/thickness of your cardboard/chipboard, you'll need to follow a few tips:

 
1.  Use a deep cut blade/housing (the blue one) and you'll need to adjust your blade settings to accomodate the thicker material
2.  Use a new/very sticky mat to hold chipboard
3.  Use the "multi-cut" feature to ensure smoothly-cut edges 
 
The best part about making custom shaped mini-albums is the fact that you can choose from ANY patterened paper assortment and cut them so that each page fits perfectly on top without having to use your craft knife to trim it out or sanding block to finish the edges!!!  I like easy, don't you?  :)

By using your Cricut to make your custom shaped mini-album, you can combine any variety of shapes you want!  I hope you'll try one of these fun albums for yourself and let us know how it turned out.  I can't wait to see your creations...be sure to leave a link to your project in the comments section below!!!


Happy Scrappin',

post signature

Friday, March 19, 2010

Fantabulous Friday 1

Happy Friday!! Each Friday we will have projects with a certain theme. Since our challenge this week was birthday related, I decided it was fitting to continue with some more birthday items.


Last summer I held a Strawberry shortcake themed birthday for my daughter. The wording and frame are from Storybook. I hot glued the ribbon on the back (folding as I glued.) The ribbon for hanging was aslo glued, then I added a clip on rose from the craft store.

More recently, I made my niece's birthday cake and cupcakes. The Cricut allows you to easily customize any birthday (I love that!) The pinwheel is on the Mother's Day cartridge, and ladybug is found on Doodlecharms.

Do you have some birthday creations to share? We would love to see!
Valerie

post signature

Thursday, March 18, 2010

Thursday's Tutorials #1

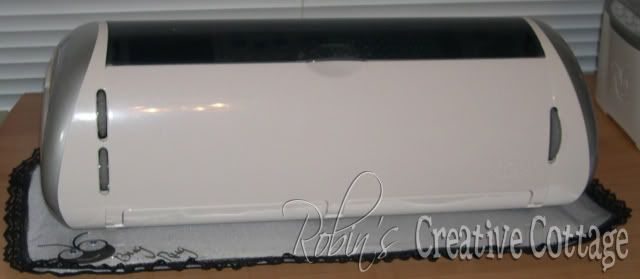
What does your Cricut Machine look like??
Before
After

Presonalize your Cricut with vinyl and give it a whole new look!

**My vinyl tutorial from start to finish:
Although my mat was sticky I wanted to make sure the vinyl wouldn't slip while cutting so I added masking tape to the edges before cutting.
I cut the vinyl using my green housing blade set at 6, speed at 3 (med.), pressure 3 (med.). I did not need multiple cuts.
The blue deep cut blade also works, I tested both and found that the green housing works just fine. If using the deep cut blade set at 4, speed at 3, pressure 3.
I cut two of the flourish designs.
After cutting my image using SCAL and my Cricut machine, I carefully remove the outer pieces of the vinyl, because this image is so detailed I cut away at the edges a little at a time so not to get the sticky side of the vinyl stuck on the detailed flourish design.
I then carefully remove any inner vinyl pieces that are not part of my flourish design.
After removing any unneeded vinyl I then place clear transfer tape over my design, I cut excess transfer tape and around the image, then burnish (rub) the image so it will stick to the transfer tape.I turned the image over then slowly and carefully removed the backing from the vinyl, the tricky part was to keep those tiny dots where they belonged.

Now the wonderfully fun part is to place the beautiful design onto my Cricut. I carefully placed my design where I wanted it to be, then rubbed it again. Yes, you guessed it slowly and carefully remove the transfer tape.... beautiful!
With the second flourish design I cut it apart because I only wanted to use portions of the image for the right side of my Cricut machine door. I followed the same steps as above applying the transfer tape, then removing the vinyl backing and placing it into position on my Cricut.
I also used SCAL with the two different fonts for the words.
Before....
After...
A few months ago I started a post over at the Cricut messageboard challenging others to decorate their Cricut machines, and the creations are amazing1 If you would like to see more ideas Click Here and get ready to be WOWED.
Now it's your turn.... I challenge you to decorate your Cricut machine.

**To view my original post on my blog along with a cut file of the flourish image click here



post signature

Wednesday, March 17, 2010

What Will Happen Each Wednesday?

Hi everyone,
I'm excited to have a day that we will get to spotlight our challenge winners and show off their creations...
On "Wednesday's Winners" our Winners will be posted here along with our top 3, this is where they will grab their badge and wear it proudly on their blog.
Challenge #001 is under way and we hope you will join us, your name could be here next week. :)


post signature

Tuesday, March 16, 2010

Quick Tip Tuesday 1

Well today is my very first ever QUICK TIP TUESDAY! and I am very happy to be here sharing with you!

The idea behind Quick Tip Tuesday is to provide you with brief tips that I have found either through my own experience or from browsing around your fabulous blogs. All of the tips will be in and around the cricut, cuttlebug, organization, scrapping you name it.

If you have a fabulous tip you would like me to share please feel free to email me at addictedtopaper@hotmail.com I would love to feature you in a quick tip Tuesday post.

The first tip I am going to share with you I found on the blog of the amazingly talented Lea Lawson. I absolutely adore Lea's blog Cupcakes and Sunshine and creations. The other day she posted this super cool tip about re-using old cricut cutting mats to assist on Stampin . . . check this out!

Lea writes: if you have a Cricut of any kind...then make sure you save these when they are no longer sticky enough to use for cutting: Wipe them down with a damp cloth or baby wipe, let it dry, and then put the plastic cover back on it. And then when you are stamping...use this to hold down the paper blocks you are stamping on. It has all the measurement grids you need for marking pencil lines where you want to stamp...and it makes a safe place for letting your stamped images dry. I use pigment ink A LOT, and we all know that it smears. I just put this whole piece to the side to let my inky images dry so they don't get ruined. This is my stamping secret that I am now sharing with all of you! It is how I get images/sentiments to stamp straight, and how I don't smear them all over.

Brilliant right? Thanks so much Lea for the fantastic tip!


Don't forget about our first challenge "Balloons and Birthday", we would love to see your creation!!


Happy Scrappin'


post signature


Monday, March 15, 2010

CHALLENGE #001


Welcome!
I'm so excited to present our first challenge here at Fantabulous Cricut Challenge Blog {FCCB}.

This weeks challenge it to include a word and shape on your project:
the word is "Birthday"
the shape is a "Balloon"

As always your project needs to have a "Cricut" cut image somewhere on your finished project, it does not have to be the word or the shape listed in the challenge.
We love to see a variety of paper crafted items; cards, scrapbook pages, 3-d items etc..

Design Team Projects:


Add your name and URL -where your project can be found on your blog.
Deadline for challenge #1 is Sunday, March 21st -midnight


Kiki-Art is sponsoring a giveaway for this weeks winner, two sheets each, 12x12 size, of the above designs. Because this weeks challenge is about balloons, Kiki got inspired to give away balloon and cloud papers. Thank you so much Kiki-Art!

post signature