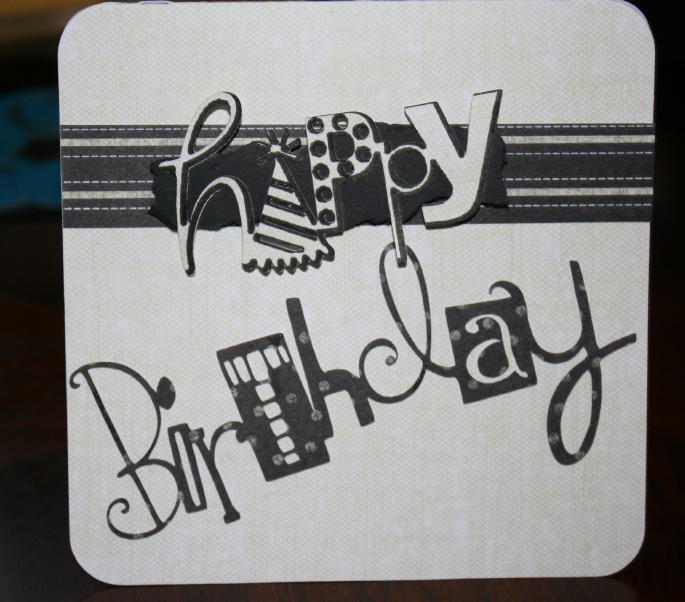
Have you ever wondered what you could do with those cricut markers. I have and they have been sitting around unused for way too long. Well Joy and Joy's Life had a great post up about it a few years back. I have copied the post below for your tip this week!
HOW TO USE CRICUT MARKERS…
POSTED BY ON AUGUST 28, 2009
The Cricut Markers are fun to use! They are available in 4 color sets: Primary, Sophisticated, Fashion and Basic.

To use the markers, you take out the cutting blade and put the marker in its place to draw instead of cut. I used this method below to outline the word “happy” before I actually cut it out. All of the outlining on the word “happy” is done with a black marker from the Cricut “Basic” color collection. The basic pack contains three black and two brown markers. The other Cricut marker sets have more variety.

The markers are used to outline things, not to color things in completely. I find them very useful for making things “pop” or stand out. When you use the markers, it’s easiest if you start drawing at the top of the page (where it loads). Set the speed at 3 and the pressure at 2. You can set the pressure higher for a broader line. To have the markers draw, just select your image and then press the “cut” button. When you’re finished drawing, remove the marker (carefully or you’ll draw all over the place) and put the blade back in. Then you just press Load Paper, Repeat Last and Cut. It should cut out the image that you just drew. The drawing will highlight the cut as it does in the word “happy” above. If I had not used the markers on “happy” you’d not be able to see it as well. It was printed on the same paper that the card is made out of…so without an outline, it would be really dull.
I’ve also used the markers to help me determine how something would look before I cut it out in vinyl. I just used some printer paper in my Cricut and let the machine draw out the words for me until I was satisfied with the font, size and wording. Then I inserted the blade and cut my vinyl.
Here’s a link to that finished project:
Ok, now go get some Markers for your Cricut and try them out!
Thank you for joining me on another Quick Tip Tuesday, I will see you again next week!


This comment has been removed by the author.
ReplyDelete